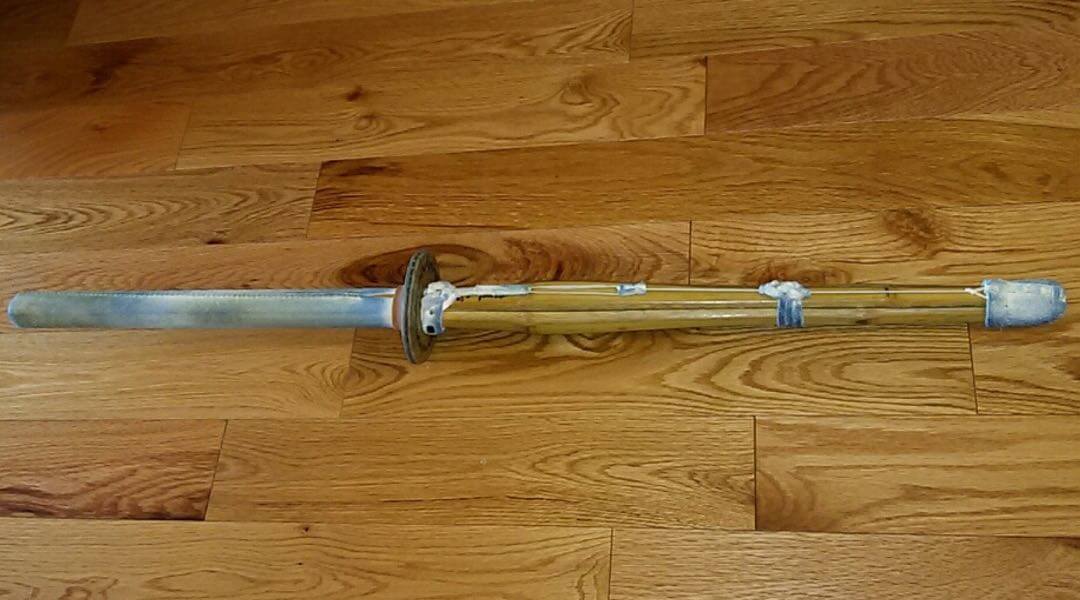
How to make a short shinai yourself, and be able to practice Kendo in any space with a low ceiling.
How to make a short shinai yourself, and be able to practice Kendo in any space with a low ceiling.

Edit: 2021/10/27
I originally wrote this tech note in April of 2020 during the Covid-19 lockdown. What a haunting, lonely time that was! Even before we started our Zoom sessions, I wanted to be able to practice without having access to a space with a high ceiling. Now that some of us are having to make do with home practice again, for the time being, I thought it might be helpful to send this around again.
2020/04/04 Hi Matsu Kaiin!
(BTW, kai = club, in = member,)
One positive thing that has come about from the current situation is that many of us have more free time on our hands. I certainly do since I cannot work, and I cannot go to kendo and those two alone usually add up to more than 60 hours per week for me. If you are one of those that are still working, thank you for helping keep the country running and especially if you are a health worker; the rest of us owe you a debt of gratitude.
I hope everyone is well and making good use of their time. I wanted to show you another thing that you can do to keep your kendo alive. We know that suburi practice is a great way to keep our kendo muscles and muscle memory in good working order, but some people do not have sufficient ceiling height to practice indoors without hitting the ceiling. I know I don’t.
We can’t raise the ceiling, but we can lower the kensen, (the tip of the shinai, right?) and no, I don’t mean hold the shinai in the middle! We can do this by using a short, practice shinai. It is not ideal, but it will allow you to do suburi practice indoors. Short practice shinai are available from some bogu stores for CAD $60-100 but I want to show you how to make your own for $0.00 if you have an old beaten up shinai that needs repair and a saw of some sort.
If you have been practicing kendo for a while, you will likely have a collection of beater shinai and shinai parts. 99% of the time the only thing that goes wrong with a shinai is that one or more of the ‘take’, the bamboo staves, split or break near the monouchi. When we have enough parts we usually match and combine the remaining good take into a refurbished shinai. Here is what I did instead.
Making a short practice shinai Stephen Nishio
Materials needed:
– Old beater shinai
– Saw
– Tape
– Knife
– Spike or bolt
– Cup of tea (I require this for any project)
Instructions:
1. Take a sip of tea and relax; you’ll do a better job if you are calm.
2. The Shorty shinai you can buy are about 30” long but if you want a custom length (like I did) you can measure it like this:
Take your beater shinai and measure how much too long it is by holding it tsuka end up, overhead against the ceiling. Mark how much you need to remove.

3. Untie the leather nakayui or leather binding and the tsuru (string) where it attaches to the tsukagawa (handle wrap) and remove the sakigawa (leather cap). You can leave the tsuru tied to everything else at this point. I taped below the mark to keep the pieces together. I’ve learned that taping both sides of the mark makes it even easier.

4. Have a sip of tea and measure it all again. Cut off the extra length by carefully sawing through each ‘take’, one at a time. I sanded the raw ends, but I suppose it is not essential since it will be covered anyway, but on the other hand, should you only do a good job when someone is looking?

5. For this one, I swapped a ten inch spike for the sakigomu (the little plastic stopper) to replace the weight of the pieces I cut away since it was close in weight and it fit nicely after I shaved the inside points of the bamboo joint or knuckle. You can use a spike, bolt or whatever weight you want, or none at all depending on how you want your shorty to feel.


6. Tape the spike or whatever you use and the new end of the shinai to keep the weight from rattling.

7. Replace the sakigawa then adjust the knot or loop in the tsuru for the shortened length of tsuru.

8. Retie the tsuru nice and tight, just the way you would with a normal shinai.
9. Replace the nakayui about a third of the way down the shinai. This helps keep the weight secure and the tsuru close to the ‘take’. It also looks pretty cool.
10. Replace tsuba and tsubadome and, dekiagari (voila!), your new short shinai is done!

11. Finish tea, admire your handiwork, then do 500 surburi. Good luck!
Stephen

Recent Comments